 Image via Wikipedia
M.C. Escher, Dutch, 1898-1972
Image via Wikipedia


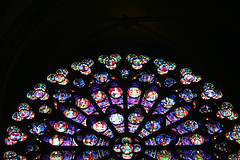 Image by *clairity* via Flickr


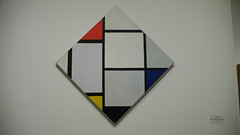 Image by Metal Chris via Flickr
 In the beginning of the lesson, students traced a square template that I had cut from used manila folders.
 Black strips glued on and deciding colors for the various shapes.
 Painting the colors in the shapes.
 Cut out and glued onto background.
![Reblog this post [with Zemanta]](http://img.zemanta.com/reblog_e.png?x-id=1973fc6e-577a-499f-9b1f-ffa3fb6917c6)
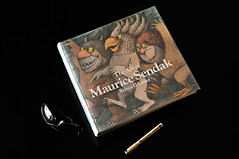 Image by Jason Michael via Flickr
I have to digress today from my regular blogging style because I want to share a site I love, "Terrible Yellow Eyes".
Where the Wild Things Are is in movie theaters now, and if you want to smile, check out Cory Godbey's blog right now!
Who can resist Where the Wild Things ART!!!!
![Reblog this post [with Zemanta]](http://img.zemanta.com/reblog_e.png?x-id=0bf6cc15-ffc1-46dc-a3fd-67c6139453f1)


 We used the back end of our paintbrushes, by drawing and scratching into the wet paint, to create texural designs in the sand.
 Image by aussiegall via Flickr
 Love the way this student added white crayon slashes around the paper. It looks like rain. After the blue wash, he added some purple and green splatters.
 This student decided to add the footbridge in crayon also, very fun. And I think his blue wash came out very interesting.
 This one was super fun to watch progress. She worked so quickly with her crayons and created beautiful depth at the edge of the pond, great shadows too.
 Image via Wikipedia
Piet Mondrian, Netherlands 1872-1944
Materials: white paper, thin strips of black paper, paint, glue.
First - We glued the black strips onto the white paper.
Second - We drew the design on a scratch piece of paper, and placed Y's, B's, R's, and W's in the shapes we wanted to be Yellow, Blue, Red, and White.
(It was very fun watching students puzzle over the decisions of where they wanted their colors. Erasing and rearranging. Seeing brains ticking makes me giddy.)
Third - We painted the shapes.


![Reblog this post [with Zemanta]](http://img.zemanta.com/reblog_e.png?x-id=a4c8a530-1e77-4601-9127-9712b643ceef)
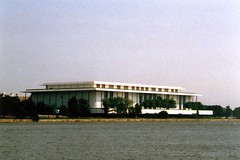 Image by wallyg via Flickr
John F. Kennedy Center for the Performing Arts works to increase arts education throughout the nation.
Editorial: Arts Initiative Will Put Sacramento on the Map
Published: Sunday, Oct. 11, 2009 - 12:00 am Page 6E
I don't live in Sacramento, but I'm encouraged by this recent article. Yes, yes, yes, more arts in the schools!
![Reblog this post [with Zemanta]](http://img.zemanta.com/reblog_e.png?x-id=065798d5-5d1c-44ab-8e06-f8e2d9e82d83)
 Image via Wikipedia
![Reblog this post [with Zemanta]](http://img.zemanta.com/reblog_e.png?x-id=7b60712f-b3a5-43c7-86e7-2d7904846446)


 Start with a dot in the middle of the page.
 Draw tiger cheeks to the left and above the dot.
 Add nose and eyes.
 Ears.
Ears.
 Chest and legs.
 Back legs.
 Stomach line.
 Rump and back line.
 Tail.
Tail. Stripes.
 Paint vines and leaves, and grass.
 For jungle foilage, we used real leaves, paint, brayer, and waxed paper.
 Roll paint onto leaves.
 Place painted leaves on top of tiger and press with your hand, or roll with rolling pin.
