
 Image by libbyrosof via Flickr
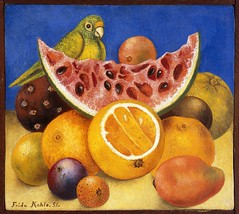
This little project based on Frida Kahlo's Still Life with Parrot was fun, but heartbreaking at the end.......(Heartbreaking is me being overly-dramatic, but sometimes my heart just sinks when I feel I missed an opportunity to encourage a child's artistic expression.)
Usually I always include in the beginning of my lessons that students are free and encouraged to create their own art. If I'm doing a directed drawing lesson, I tell the kids that they're free to draw similar lines as mine, or not similar. Our mantra is "You're the Artist of Your Work" -- make it yours, however you want your art to look.
Well, somehow in my haste and absentmindedness I forgot to share these words and at the end of this lesson one of the students said, "I really wanted to make a red parrot and different fruit." I said, "Well why didn't you?" He said, "I didn't know that would be okay." ----See what I mean, heartbreaking.....It's such a fine line between giving enough instruction to make the kids feel comfortable to create and not giving too much instruction to hinder their creativity. I'll be teaching 20 years from now and still working on that one!
Usually I always include in the beginning of my lessons that students are free and encouraged to create their own art. If I'm doing a directed drawing lesson, I tell the kids that they're free to draw similar lines as mine, or not similar. Our mantra is "You're the Artist of Your Work" -- make it yours, however you want your art to look.
Well, somehow in my haste and absentmindedness I forgot to share these words and at the end of this lesson one of the students said, "I really wanted to make a red parrot and different fruit." I said, "Well why didn't you?" He said, "I didn't know that would be okay." ----See what I mean, heartbreaking.....It's such a fine line between giving enough instruction to make the kids feel comfortable to create and not giving too much instruction to hinder their creativity. I'll be teaching 20 years from now and still working on that one!
At any rate, this lesson helped us focus on foreground and background. And, we solidified that objects in the foreground are low on the page, while objects in the background are high on the page.
Step 1: Draw fruit in the foreground.
Step 2: Draw fruit in middle ground.
Step 3: Draw fruit and parrot in background.
Step 3: Draw fruit and parrot in background.
Step 4: Draw table and add highlights and shadows.


 Thanks Paige!!


