Wednesday, March 30, 2011

Painting Recycled Books

For this project,we used recycled hardbound books instead of canvas.  I started collecting discarded books from my library in the fall, and had enough for all students by March.
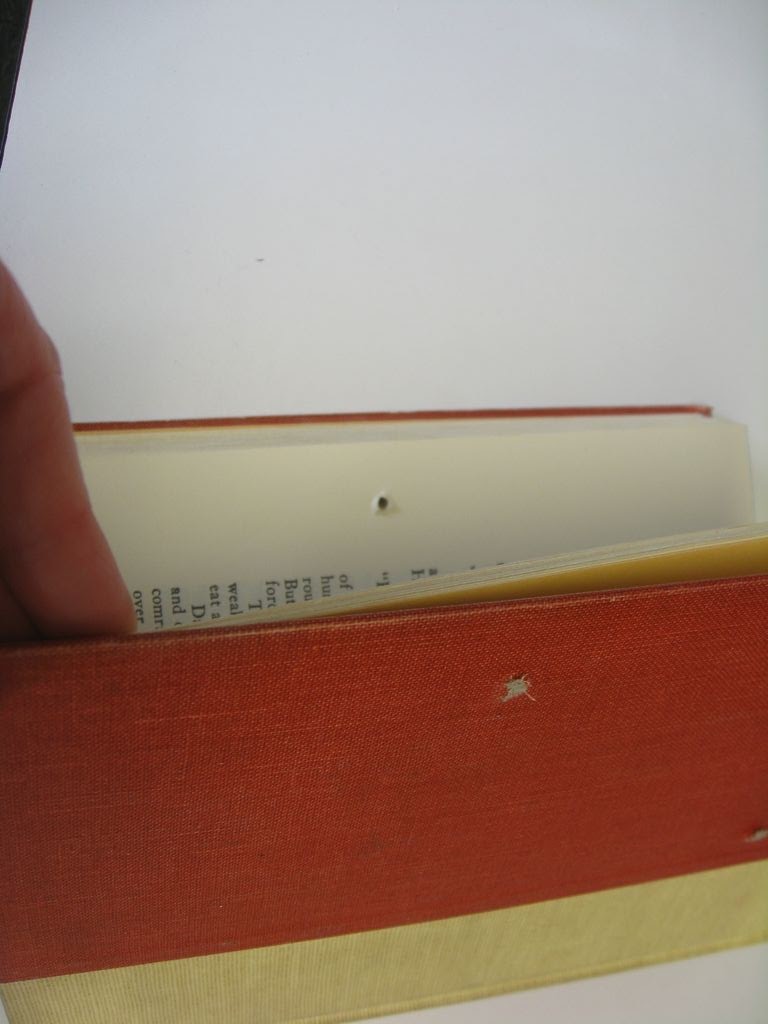
Because I wanted the students to have the choice of standing or hanging the finished books on a wall, we started by drilling 2 holes in the back cover and using wire for a hook.

Then a single hole needed to be drilled through the entire book to secure the cover and pages with string, so it wouldn't flop open while hanging on a wall.

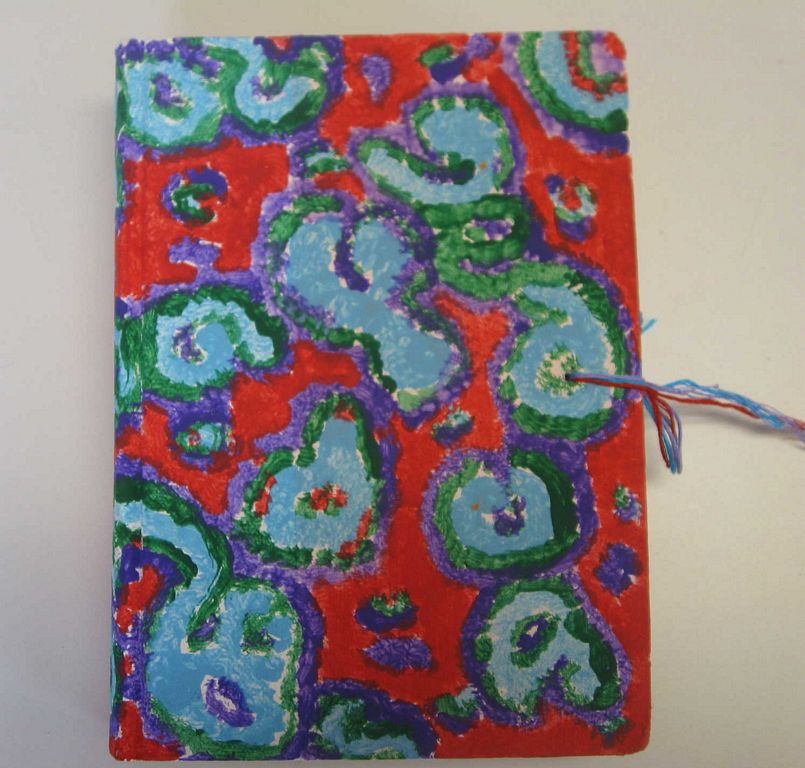
Since the books had various covers, we first painted the covers white.  Note, the older red books bled into the white paint, so their primed background was pink.  The kids got very worried, but found out later that acrylic will cover colors underneath, and they painted over the pink the next day with their subject or design.
After painting the books, students chose 3 colors of embroidery thread and used a needle to put the thread through the holes, one color at a time.  Then threads were tied and the book was done.


(Side Note *HELP* - what kind of brushes do your students use with acrylic paints?  Ours are horrible, and I'd like to purchase new ones.  Any ideas on which ones I should get would be GREATLY appreciated.)

Monday, March 28, 2011

Mona Lisa Mural

My students' Mona Lisa mural (more info. about creating her here)is up and in the window of our super awesome local art store called The Artery, in Atascadero, CA.  I love the atmosphere and ambiance of locally owned shops like this one so much more than big-box-corporate stores with names that start with "M" and end with "s"......don't you?
This is the kind of project that would've been somewhat time consuming to do on my own.  Luckily, the owner of the store was my partner in mounting and hanging the mural.

Here's the method we chose for showing the piece, it was quite simple:
Step one: Glue each 9x12" colored paper to 11x14" black mat board.
Step two: Using hot glue guns, attach 11x14" mat boards together with 3x3" mat boards glued to thier corners.  (You can see part of the 3x3" colored mat boards in between the corners of the each section of the mural.)
Big thanks to The Artery & NCCS high school art students!

Tuesday, March 22, 2011

3D Cubes


This was super fun lesson I found on the School Arts Magazine website, and the lesson is credited to: Explorations in Art, Davis Publications, Grade 2.  I used it with grades 4, 5, 6 and the kids enjoyed it a lot.

Each child needs 12 rectangles, 2"x4".  (Note, a 12"x18" piece of construction paper will yield exactly 27 of these rectangles.  So the cutting doesn't take as long as it seems.) 

We decided to decorate our rectangles with black marker before building the cubes, but they can be built plain too.  (So, if you decide to decorate, do that before folding:)

Step 1:  Fold each rectangle, lengthwise, into a 90 degree angle.
Step 2:  *Glue 4 rectangles to form the bottom, then glue 4 rectangles to form the lid.
Step 3:  Glue 4 pillars to inside corners of the bottom.
Step 4:  Add glue to inside of lid. 
Step 5:  Place lid on outside tops of pillars.

*Tip- tell students to hold pieces together with their fingers for the count of "5" each time they glue a piece to another piece.


  Thanks to San Benito Elementary students!

Thursday, March 17, 2011

In like a lion, out like a lamb.


Big thanks to Teach Kids Art for this lesson idea.  The kinders and 1st graders loved the magic of painting on top of white crayon resist and being able to see their darling lambs AFTER the paint is added.
Because I was doing this lesson with a public school, I decided to use a spring poem instead of the religious quote used originally.
Here's the poem I shared with the kids before our project.

In Like A Lion, Out Like A Lamb
by Lorie Hill
March roars in like a lion
So fierce,
The wind so cold,
It seems to pierce.

The month rolls on
And Spring draws near,
And March goes out
Like a lamb so dear.

 First we wrote our poem on the white paper with black crayon.  (I prepped the paper by drawing 4 faint pencil lines for the words, and we carefully wrote 2 words on each line.)
Second, we drew a curvy black "ground" lines, black legs, white fluffy-cloud bodies, black oval heads, and black tails.
Third, we outlined suns with black crayon, and added some grass.
Fourth, we painted the ground green, then the sky blue.


This student is blind, and his grandma is helping him with this project.

San Gabriel 1st graders!
Enhanced by Zemanta

Monday, February 28, 2011

Light and Dark

I like this easy lesson for reinforcing color values, light and dark.


Fold square paper in half 4 times to end up with 16 small squares.  Then choose 8 different colored crayons, and color two squares with each crayon.  One square should be colored dark, and the other square is colored light.....depending on time, we also talk about using colors that are "warm/cool", "complementary", "analogous", etc.  You can make this lesson as complicated, or easy as you prefer.

Tuesday, February 22, 2011

Blogger Shout Outs, Thanks!


Stylish Blogger award

Big Thanks to Jacquelien "Kids Artists" for a blogger award!  This makes me smile......
Here are the requirements to receive graciously and play along-
  1. Link back to the person who awarded you
  2. List 7 things about yourself
  3. Pass the award along to 5 other blogs that I enjoy reading.
Seven things about myself...
My "guest room" in my house is also my "art room", it's a horrendous mess with sample art lessons piled high on every surface in the room including the bed.  I clean it before a guest comes, then it's a terrible mess again within 2 weeks.
I prefer to live in the country, but I want to be in big cities when on vacation.
I always have at least 3 students, who I think are better artists than myself. (No matter their age.)
I didn't like the taste of beer until I became pregnant and had my son.  Now I love having a beer with tacos, or any Mexican food for that matter.
I'm a cat person, always have been.
I easily get sucked into spending more time than I should looking at other blogs.
I love the way my students become themselves when doing art.

And now I'm going to pass along this award to the 5 blogs that I consider my "go to" sites when cruising bloggerville.  Keep in mind that these are at the top for this moment, could be a different list tomorrow...
1. Made by Joel -
This guy gets "Dad of the Day, Month, Year, Century..."  His kids are so lucky and so are we for his sharing of his constant cleverness.
2.  Mini Matisse -  Mrs. Hahn shares great ideas, and I enjoy what appears to be her much greater tech savvy than I have.
3.  Kids Artists - Jacquelien (I know you're saying it's rigged, isn't she the one who gave "you" the award?) is awesome in the amount of ideas she posts regularly.  I know that I better have time on my hands if I missed looking at her blog for a while because she's going to have a lot of new posts.  I like her blog so much, I was looking at it regularly even before I found out how to get in English.
4. Art Projects for Kids - Kathy Barbro is pro!  Her past life as a graphic artist serves her well, and it shows all over her blog.  Her lessons are varied and she too posts a lot with very interesting and "easy to implement" ideas.
5. And #5 is YOUR blog. If it's about doing arts and crafts with children.  I'm sure I've seen it, and I'm sure I've seen something that you've posted which I've copied and tucked away in a file to use in the future.  This file is huge, but just keeps on growing.

Wednesday, February 16, 2011

Mona Lisa Mural

My students were invited to create a large piece of art for the front window of our local art store called The ArteryThe Mona Lisa seemed appropriate, so we made her using the following steps.
1.  I divided a 8x10" drawing of Mona Lisa into 24 rectangles and gave each student one of the small rectangles.
2.  The students drew a 4x4 grid onto their small rectangle piece of the Mona Lisa drawing, and a 4x4 grid onto their white 9x12" construction paper.
3.  By using the grid method, the students drew their piece of the Mona Lisa onto their 9x12" paper, then traced drawing with black marker, erased grid lines, and colored shaped with colored pencils.
4. For interest, students were told to make their drawings "mostly" warm or cool colors.

Each student was given a small rectangle piece after the drawing below was cut into 24 rectangles.
 Then the student drew a small 4x4 grid on his/her piece.
 Then drew a 4x4 grid on 9x12" paper.
 Then enlarged their original piece by drawing on the grid.
 And colored.


 She looked like this before pieces were mounted on black background and hung in the window.
Soon..........I'll go stand out in the rain and get a picture of the final installation, hopefully.  (No idea why I didn't take a pic of it after we hung it up in the window?)
 

Tuesday, February 8, 2011

Freezer Paper Stencils

Decided to reminisce and show a project we did last summer..........t-shirt decorating using freezer paper stencils.  Big thanks to  I am Momma-Hear me Roar for her great tutorial on making them.
I started by giving kids pictures to trace onto freezer paper, then-
1. cut picture out of freezer paper
2. iron onto shirt
3. paint in stencil using fabric paint
4. let dry
5. peel off freezer paper
6. iron over the paint to set it


 Everyone loved their shirt!