Monday, September 27, 2010

Op Art, Spheres & Cones

Movement in Squares, by Bridget Riley 1961.Image via Wikipedia
This was the 3rd project in our series of Op Art lessons.....Students took their knowledge of creating "spheres" and added "cones" in the background. Big thanks to Jodi at One Crayola Short for sharing this super lesson. It's a great primer for getting students to really wrap their head around how adding "values" can truly make a big difference in their art! (My students are high school, but Jodi did this lesson w/ 5th graders -- Younger kids can handle this, they'll just need more direction and time.)
Step 1: Students followed same instruction for creating spheres as in sphere lesson.
Step 2: Draw and even number of diagonal lines emanating from a point somewhere near the middle of the page. Remind them to "jump over" their spheres.
Step 3: Students drew curved lines inside each cone shape, alternating between "smile" and "frown" curves on every other cone.
Step 4: Place black dots in the areas to be colored black, then colored them.
Step 5: Color the rest of the shapes being careful to darken the outsides of each shape and leave the middle lightest. (High values in the middle, and low values near the edges of each shape. Sometimes I even had the students put their finger in the middle of each shape to remind them not to color that area as dark.)


Big Thanks North County Christian High School Art Students, 2010-11!!!
Enhanced by Zemanta

Friday, September 24, 2010

Op Art "Floating Spheres"

Kids love the power of being able to create optical illusions - and they're always shocked at how easy it is! I've done this lesson with students age 11 and up. Younger students make the shapes larger, and older students have fun overlapping, etc. Here is the lesson that inspired me, and another fun Op Art lesson is here too.
Step 1: Trace some circles on paper.
Step 2: Add curved lines (we call them horizontal "smiles and frowns" & vertical "c's and backward c's - OR "longitude and latitude" lines) to turn the circle into a sphere. Younger students can make less lines.
Step 3: Draw a grid for background, and remember to "jump over" the spheres with the grid lines.
Step 4: Color shapes, leaves every other shape white b/c the negative space is necessary to help create the optical illusion.
Step 5: Add shadows on sides of spheres.


Thanks North County Christian High School art students!!!!

Tuesday, September 14, 2010

What kids say...............

A photograph of applesauce, specifically Musse...Image via Wikipedia You know those moments in the classroom when you're expecting one thing to come out of kids' mouths, but instead something wildly different appears? You know, the "stop dead in your tracks" moments trying to wrap your brain around what just happened? (I'm referring to the good ones, we can just forget about the bad ones - although they do happen too.)

Well, many moons ago I was Ed. Director at our local Performing Arts Center at the university. One of my favorite duties was leading "backstage tours" for schoolchildren. We did a short skit w/ each class, during the tour, where a couple kids went onstage and told some jokes. They were announced over house p.a., and spotlighted, etc. while their classmates sat in the audience. While the kids were preparing backstage, I would prepare the audience. I pointed to a sign and said, "Now this sign says-" and before I could finish my sentence a very young boy shouted out "APPLESAUCE!" The sign actually said "Applause". Well.....you know the rest, kids told jokes, applause sign went up, kids gave their applause ----and I couldn't wipe the smile off my face for the rest of the day:)
Enhanced by Zemanta

Monday, September 6, 2010

Seeing with your "Artists Eyes"

New school, new year!!! Guess what, this year I actually have a classroom of my own (well technically, it's not my own, it's also the Staff Room at a small private K-12 Christian school) - but I LOVE it just the same! I'm teaching one art class, everyday, each afternoon & it's 10th, 11th, & 12th graders mixed together....how enjoyable for me! I'm thouroughly challenged by all the new prospects and ideas swirling in my head. So, so many ideas, now to just get them organized in a manner that will bring them to fruition, ahhhhhh - guessing you all can imagine my prayers these days.

First day we talked about looking at things differently, noticing details, using our "ARTIST EYES" - then the students drew these fabulous eyes for our first bulletin board.

Here's a tutorial I found on drawing an eye, (so sorry I forgot to note the address and author). There are million eye drawing tutorials, but I thought this was a good one for beginners. We also spent some time looking at each other's eyes, what a great thing to do to break the ice on the first day of school!

Big thanks to North County Christian School, high school artists!!!

Thursday, August 26, 2010

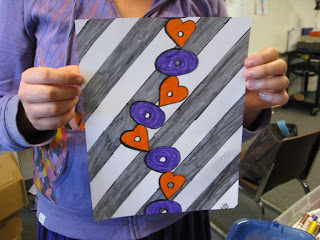
Stacked Shapes - Op Art

These "Stacked Shapes" were done on the LAST day of school, this past June. The kids had already packed their things, and the classroom was bare....but no worries, still a little time for just ONE MORE art lesson! (I try not to pick favorites, can't help it this time....It's the Cheese-Its!)Big thanks to Deborah Brooks at Arapahoe Ridge Elementary for submitting this lesson plan to Artsonia, and she thanks Linda Welling for showing her the lesson first.Step1: Choose 2 shapes, then draw them vertically in an AB pattern.
Step 2: Add a circle to the inside of each shape.
Step 3: Draw a shadow line on the outside edge of each shape.
Step 4: Draw a shadow line inside the circle, on the "opposite" side of where the first shadow line was drawn. (This indicates a hole in the shape.)
Step 5: Color & add a background.The results.......

Big thanks to Flamson Middle School kids in Sra. Velasco's 7th grade class!

Sunday, August 22, 2010

Fall means back to school - My 1st online class....

Fall foliage in Central Park, New York City (I...Image by Alaskan Dude via Flickr Have you been tempted by online classes taught/offered by fellow bloggers? I have, but never signed up....Until now! This one seems super fun (and it helped that I knew I had about $25 in my PayPal account jumping up & down saying "You've had me in here for awhile now, waiting for that something special on Etsy & you haven't found it -- so here I am, spend me now.").
Carla's sample worksheet sealed the deal, and I'll officially be a "student" again on Sept. 15th! Maybe you'll join me? Let me know if you do:)

P.S. I also signed up because Carla says the class is 10 min./day & if I don't take at least 10 min. a day to do something just for me this fall, I deserve those extra wrinkly furrows that will surely be added to my forehead!
Enhanced by Zemanta

Monday, August 16, 2010

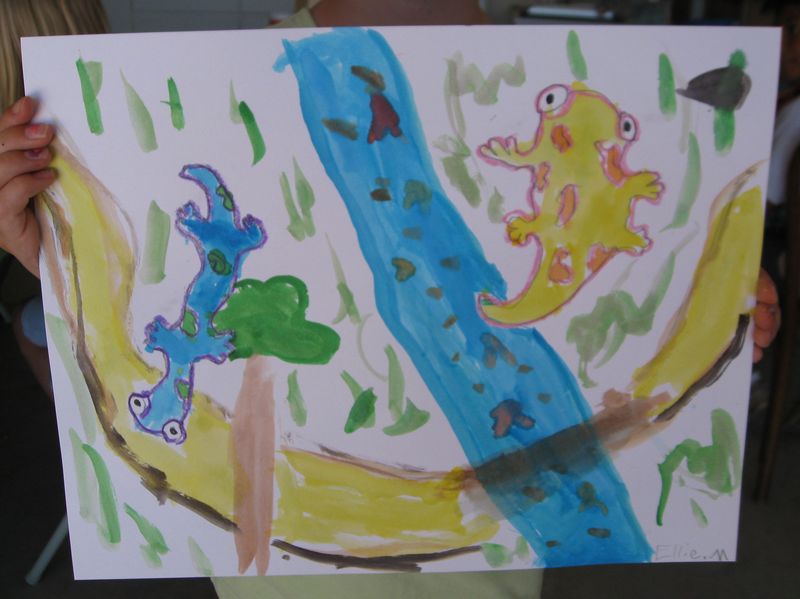
Cool Geckos!

'CoverCover via Amazon
This lesson came from "The Usborne Book of Art Skills" and kids love it. Step 1: Draw lizards with pencil on thick white paper.
Step 2: Trace all pencil lines with crayon or oil pastels.
Step 3: Watercolor the lizards and background.
(Here's a simple step by step lizard drawing tutorial.)
Eyes
Add rainbow line connecting eyes.
2 fish hooks
Curvy toes on ends of fish hooks.
2 body lines with hooks at the end
Curvy toes.Big smile line for tail.

Add spots.


BIG Thanks to summer ARTISTS:
Keara, Ellie, Katelynn, Hobie, Isaac, Hannah, Michelle, Molly
Enhanced by Zemanta