Thursday, August 26, 2010

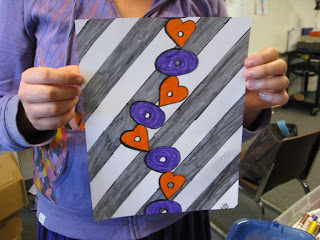
Stacked Shapes - Op Art

These "Stacked Shapes" were done on the LAST day of school, this past June. The kids had already packed their things, and the classroom was bare....but no worries, still a little time for just ONE MORE art lesson! (I try not to pick favorites, can't help it this time....It's the Cheese-Its!)Big thanks to Deborah Brooks at Arapahoe Ridge Elementary for submitting this lesson plan to Artsonia, and she thanks Linda Welling for showing her the lesson first.Step1: Choose 2 shapes, then draw them vertically in an AB pattern.
Step 2: Add a circle to the inside of each shape.
Step 3: Draw a shadow line on the outside edge of each shape.
Step 4: Draw a shadow line inside the circle, on the "opposite" side of where the first shadow line was drawn. (This indicates a hole in the shape.)
Step 5: Color & add a background.The results.......

Big thanks to Flamson Middle School kids in Sra. Velasco's 7th grade class!

Sunday, August 22, 2010

Fall means back to school - My 1st online class....

Fall foliage in Central Park, New York City (I...Image by Alaskan Dude via Flickr Have you been tempted by online classes taught/offered by fellow bloggers? I have, but never signed up....Until now! This one seems super fun (and it helped that I knew I had about $25 in my PayPal account jumping up & down saying "You've had me in here for awhile now, waiting for that something special on Etsy & you haven't found it -- so here I am, spend me now.").
Carla's sample worksheet sealed the deal, and I'll officially be a "student" again on Sept. 15th! Maybe you'll join me? Let me know if you do:)

P.S. I also signed up because Carla says the class is 10 min./day & if I don't take at least 10 min. a day to do something just for me this fall, I deserve those extra wrinkly furrows that will surely be added to my forehead!
Enhanced by Zemanta

Monday, August 16, 2010

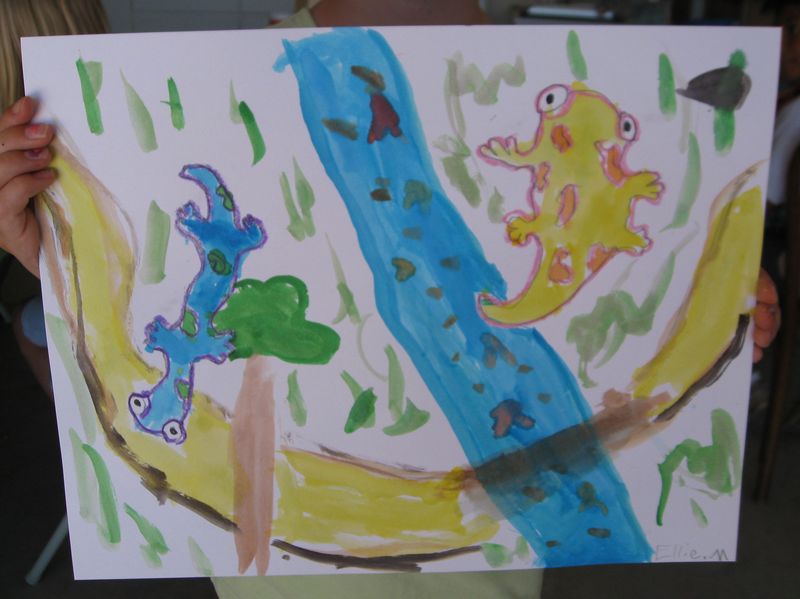
Cool Geckos!

'CoverCover via Amazon
This lesson came from "The Usborne Book of Art Skills" and kids love it. Step 1: Draw lizards with pencil on thick white paper.
Step 2: Trace all pencil lines with crayon or oil pastels.
Step 3: Watercolor the lizards and background.
(Here's a simple step by step lizard drawing tutorial.)
Eyes
Add rainbow line connecting eyes.
2 fish hooks
Curvy toes on ends of fish hooks.
2 body lines with hooks at the end
Curvy toes.Big smile line for tail.

Add spots.


BIG Thanks to summer ARTISTS:
Keara, Ellie, Katelynn, Hobie, Isaac, Hannah, Michelle, Molly
Enhanced by Zemanta

Thursday, August 12, 2010

What kids say!

Saw this in San Francisco at the De Young Museum this week, Renoir, Boy with Cat.
Next to me, mom says to her little girl, "Oh Kristin, look at this painting, it has a cat. I bet it's your favorite?" Little girl said, "I'd like it better if he had his underwear on."

Monday, August 2, 2010

Owl Reflections

Here are the steps for "Owl Reflections":
1. Fold large white paper in half and draw owl, branch, moon, stars, and water line with black crayon or oil pastel, on the top half of the paper. (Only draw the outline, do not color yet. The lines need to be dark.) Here's an easy tutorial for owl drawing.
2. Fold drawing over and press hard to get an imprint on bottom half of paper. (Tell students the image will be hard to see and they may have to use their "Superman" eyes to see it.) Then trace over the lines on the bottom half of the paper w/ black crayon or pastel.
3. Now color in the owl, branch, moon, and moon glow behind the owl.
4. Paint over the whole paper with blue watercolor. Then add more blue watercolor to the water, to delineate the difference between it and the sky.


Thanks bunches summer art students Hobie, Taylor, and Trevor!!!

Thanks also to Andrea Mulder-Slater, of KinderArt for the lesson idea:)

Wednesday, July 21, 2010

X-Rayed Art

When visiting the Norton Simon Museum in Los Angeles two weeks ago, I was enthralled with the x-ray pictures the museum posted of various artworks.

Here's a picture of the x-ray of van Gogh's painting titled "Winter - The Vicarage Garden under snow". This x-ray shows a painting van Gogh did and for whatever reason, he chose to paint over it. I have many artist friends who do this too, but seeing this master's real x-ray made me kind of giddy... More proof to share with my students that everyone creates art they're unsure of - the goal is not to let it deter you. Just like van Gogh didn't! The x-ray above shows the painting that exists "under" the painting below. More info. about the painting here.

Tuesday, July 13, 2010

Renoir said it well!

"One must from time to time attempt things that are beyond one's capacity."
Auguste Renoir, French, 1841-1919
This is why teachers are so wonderful, everyday they are coaxing children to go out on that limb. (Some of us need to coax ourselves too. Yes, that would be me!)

Friday, July 9, 2010

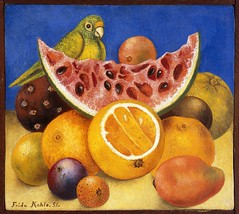
Frida's Parrot


Image 14Image by libbyrosof via Flickr


This little project based on Frida Kahlo's Still Life with Parrot was fun, but heartbreaking at the end.......(Heartbreaking is me being overly-dramatic, but sometimes my heart just sinks when I feel I missed an opportunity to encourage a child's artistic expression.)
Usually I always include in the beginning of my lessons that students are free and encouraged to create their own art. If I'm doing a directed drawing lesson, I tell the kids that they're free to draw similar lines as mine, or not similar. Our mantra is "You're the Artist of Your Work" -- make it yours, however you want your art to look.
Well, somehow in my haste and absentmindedness I forgot to share these words and at the end of this lesson one of the students said, "I really wanted to make a red parrot and different fruit." I said, "Well why didn't you?" He said, "I didn't know that would be okay." ----See what I mean, heartbreaking.....It's such a fine line between giving enough instruction to make the kids feel comfortable to create and not giving too much instruction to hinder their creativity. I'll be teaching 20 years from now and still working on that one!

At any rate, this lesson helped us focus on foreground and background. And, we solidified that objects in the foreground are low on the page, while objects in the background are high on the page.

Step 1: Draw fruit in the foreground.

Step 2: Draw fruit in middle ground.
Step 3: Draw fruit and parrot in background.

Step 4: Draw table and add highlights and shadows.


Saturday, July 3, 2010

Clay Funny Fish....Bloop, blub, blub......

Funny fish, blowfish, crazy fish.................I've been looking at various pics of these fish swimming around other blogs & finally it was my turn to share this idea with some of my students. They enjoyed the process and I especially want to thank Art Projects from MN Gal for posting her how-to on this lesson. You can see her directions here. Blub, bloop, bloop, bloop, bloop... Right-side up, Upside down Fish....

Top Hat fish, ready for the special occasion!


Thank you Summer 2010 art students!!!!