Thursday, March 4, 2010

What kids say (and draw)!

This one has been floating around the internet and teacher's lounges for a while now...but if you haven't seen it, you'll get a laugh. Make sure you read the caption.
This parent was saved by the truth, but there have been times when students will tell me things that their parents would be very embarrassed about if they knew their child was blabbing about it. (They're funny things.) All you parents out there, don't worry, I'm a professional-and it's "in the vault"!
Always check your kid's work before they turn it in. After it was graded and the child brought it home, she returned to school the next day with the following note:
Dear Ms. Davis,
I want to be very clear on my child's illustration. It is NOT of me on a dance pole in a strip joint. I work at Home Depot and had commented to my daughter how much money we made in the recent snowstorm. This picture is of me selling a shovel.

Tuesday, March 2, 2010

Asian Koi Fish

Koi fish feeding frenzyImage by jcolman via Flickr

The students were learning about how Chinese immigrants saved the day when it came to building our railroad out west, so I decided to it was time for some Asian art. Steps:
Use white pastel (crayons will work too, just not as dramatic) to draw the outline of a Koi fish on blue construction paper. Here are simple drawing instructions.
Draw back fin, and the top of the body.

Add the bottom of the body.

Add the nose, and fins.

Add the eyes.

2. After adding the eyes, the students trace their white outline, very gently with a black pastel.
3. Then the students outline random blotches with orange pastel, and color the blotches in with orange, yellow, and red.
4. Lastly the students color in the white, and added some white waves in the background.


Thank you Flamson students in Ms. Brosette's 8th grade class!!!!
Reblog this post [with Zemanta]

Sunday, February 28, 2010

Designer Olympic Rings

Cropped transparent version of :Image:Olympic ...Image via Wikipedia


Oops, better late than never, probably not on this one?
I'd intended to post this project earlier, alas, it's now the last day of the Olympics! (Oh well, maybe it'll come in handy in 2 years during the summer Olympics?)

Steps for creating Designer Olympic Rings:

First Copy one page of rings for each child. Here's a PDF for you to download.
1. Color the rings, Blue, Black, Red, Yellow, Green. (We also traced black around the edges to make the rings standout better against the background.)
2. Draw black line designs on white background paper.
3. Cut out rings.
4. First glue top of black ring slightly above the center of background paper. Then glue top of blue and red ring on either side of black ring. (Only the tops of the rings should be glued down so that the yellow and green rings can slide through the bottoms.)
5. Cut a slit in yellow ring, slide it through the blue and black ring, then glue it down.
6. Cut a slit in green ring, slide it through the red and black ring, then glue it down.


7. Add a color background paper.


Reblog this post [with Zemanta]


Big thanks to San Gabriel Elementary artists in Mr. Eaton's, Mrs. Sherer's and Mrs. Havemann's classes!

Wednesday, February 24, 2010

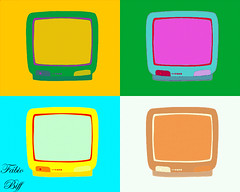
Pop Art


Temporada 12 - Desafio IMG 05 - Pop ArtImage by Fábio Biff via Flickr

*Note, small glitch, if you tried to purchase my Andy Warhol PDF lesson this morning of 2/26/10, the transaction was stopped by PayLoadz b/c the number of downloads exceeded my account level for this month. My PayLoadz acct. is now upgraded and all future transactions will go through, no problem. Sorry for the inconvenience.


Do your kids love Pop Art as much as mine do? Something about Pop Art seems to resonate with "every" child each time I do a Pop Art lesson.

For this lesson, the students created 3 different drawings on small 4" x 4" pieces of white computer paper. Then they chose one of the drawings to use as their master for creating 4 prints inside 4 quadrants of a 9" x 9" piece of white construction paper.

Here are instructions for the lesson below, but if you'd like more precise instructions, with blackline masters and another version to use with younger kids...Check out my "Andy Warhol/ Crayon Pop Art Lesson" available as a PDF download. It also includes student friendly background information about Andy Warhol and Pop Art.


Each student will need the following materials:
pencil
3 pieces of 4x4" computer paper
1 piece of 9x9" white construction paper
Black Sharpie for tracing.
Crayons, pastels, or markers for coloring.

Step 1 - Using a 4x4" paper, first they each drew a CRAYON, following my directed drawing lesson on the board. Then they each drew a SOUP CAN, again following my directed drawing lesson on the board. Lastly, they created their own drawing of a "popular" object.

Step 2 - Students chose one of their drawings and created 4 prints of it on their 9x9" construction paper. To make the prints, students slanted pencil and filled the backside of their drawing with lead. Then turned the drawing over and traced it with pencil onto the construction paper.

Step 3 - Students traced that print with black marker.

Step 4 - Repeat steps 2 & 3 until all four quadrants of the sqaure have an image drawn in black.

Step 5 - Color.


Really big thanks to Mrs. Venn's students at Flamson Middle School!
Reblog this post [with Zemanta]


Friday, February 19, 2010

Sci-Fi Art

'portadaImage by vivir_descalzo_mx via Flickr

To go with science fiction studies, here's an alien landscape art project.
We used:
9x12 tan construction paper
pastels
white crayon
and 3"x4" piece of scratch paper for the practice alien.

First I did a directed drawing lesson and students used a "white crayon" because it wouldn't show later under the pastels. (If they made a mistake, they could leave it there.) We drew horizon line, front & back mountains, then spaceship.
Next, students were given a 3"x4" piece of scratch paper to practice drawing an alien with their pencil. The size of the paper helped them make the alien proportionate to the background. Then students drew their alien onto the main paper with white crayon.
Then kids filled in their art using pastels, and lastly added the white pastel to make the spaceship look like it's travelling.


Thanks bunches to Sra. Velasco's Flamson Middle School 7th graders!

Reblog this post [with Zemanta]