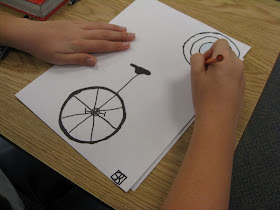
We're getting ready for the Amgen Tour of California bicycle race to come to our town. What a fabulous, exciting event!! Have you seen it on t.v.? These were made to go in storefront windows in downtown Paso Robles where Stage 5 of the race will be finishing on May 19th.
Made by Joel is one of my favorite blogs. He's so clever and his art is so fresh. I turned to his "bicycle art" to inspire this lesson. We talked about composition and minimalism before doing our own versions.
I gave the students a circle template for the wheels, then I helped them draw a bicycle with a directed drawing lesson. (I let the students embellish or redesign their bike drawings, as they wanted.) The students also liked "signing" their art with their initials in a similar style to Joel Henriques artist signature.
Here are the steps for drawing a simple bike:
Circles for wheels and gears in between
Triangle for back of bike frame.
Front tubing, attached to front wheel.
Top tube, and front down tubing attached to front tube.
Seat post and handlebar post.
Seat, shaped like a saddle.
Handlebars, I encourage kids to make their handle bars facing up or down or straight out.
Cranks and pedals attached to gears.
Spokes and tires.

Great job Flamson students!!
Coming soon will be another version of bicycle art using construction paper and glue!


You've been given the Versatile Blogger Award... check it out!
ReplyDeletehttp://art-paper-scissors.blogspot.com/2011/04/versatile-blogger-award.html
So quick and easy! I have linked this to my blog.
ReplyDeleteThank you!