Thursday, October 29, 2009

Ceiling or floor?

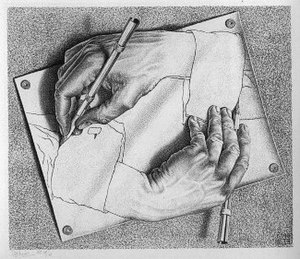
Drawing Hands, 1948.Image via Wikipedia

"Are you really sure that a floor can't also be a ceiling?"
M.C. Escher, Dutch, 1898-1972

Wednesday, October 28, 2009

Stained Glass Windows


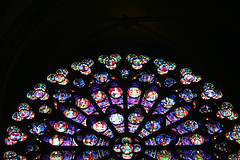
Kaleidoscope, Stained-Glass Rose Window, ParisImage by *clairity* via Flickr


Kids were studying Medieval period, so we decided to make stained glass windows. We learned about the "rose" window in medieval churches, then made our own by drawing with pastels on black paper.


First step was to make a cross and put a design in the center, then 4 designs on each axis. Then we continued by dissecting each section and making more designs, always in the center of the dissections, on the axis.
Last, draw a circle around the outside. Ours were intended to be large and go off the page, hence only part of the circle was drawn.


Thank you Flamson 7th graders in Mrs. Velasco's class!

Tuesday, October 27, 2009

More Mondrian

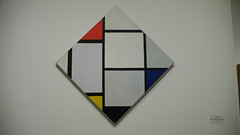
Tableau No. IV; Lozenge Composition with Red, ...Image by Metal Chris via Flickr


Here we did another version of art inspired by Piet Mondrian. We found that he did a number of paintings inside a tilted square. I've done a little research and it looks like these paintings of his were called "Lozenge Compositions", but I haven't found enough information to give me confidence that "lozenge" is the correct word. Do you know anything about Mondrian's paintings being called Lozenge paintings? If so, I'd love to hear from you.....really, because I think "lozenge" is a fabulous word for this art if it truly is correct.

In the beginning of the lesson, students traced a square template that I had cut from used manila folders.
Then they glued pre-cut black paper strips on the square.

After that, they drew a quick sketch of their composition and placed "Y" for the yellow squares, "R" for the red squares, and "B" for the blue squares. (Just like the last Mondrian project it was fun to watch them re-arrange their colors.)

Next step was to paint the shapes inside the square.

Last, cut out the square and glue it tilted on a black background.


Black strips glued on and deciding colors for the various shapes.


Painting the colors in the shapes.


Cut out and glued onto background.


Reblog this post [with Zemanta]

Thursday, October 22, 2009

Wild Things....

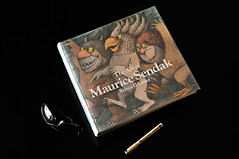
The Art of Maurice Sendak - CoverImage by Jason Michael via Flickr

I have to digress today from my regular blogging style because I want to share a site I love, "Terrible Yellow Eyes".

Where the Wild Things Are is in movie theaters now, and if you want to smile, check out Cory Godbey's blog right now!

Who can resist Where the Wild Things ART!!!!

Reblog this post [with Zemanta]


Wednesday, October 21, 2009

What kids say......

When I teach at schools I carry large prints in a large canvas portfolio bag. It's about as big as the one featured in the Dick Blick catalog as seen here (that's not me):


One day I was walking out to my car in the school parking lot, and a little girl and her mom were walking toward the office on the other side of the parking lot..............the girl said to her mom, "Mommy, look at how big that lady's purse is!"
(For the record, my real purse is smaller than average.)

Tuesday, October 20, 2009

Desert Texture

Oops, I was lazy with the camera and didn't get many pics of our Desert Art.
But since knowing how the smallest image can inspire you educators to create something interesting & fabulous with your students - I'm posting anyways.....
We used the back end of our paintbrushes, by drawing and scratching into the wet paint, to create texural designs in the sand.


Monday, October 19, 2009

Lily Time....

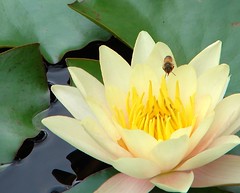
Bee over waterlilyImage by aussiegall via Flickr

When I hear the name Monet, I can't help but think LILIES!
For this lesson our goal was to give the "Impression" of just a moment in a lily pond. A view that looks as if it were captured for just a moment before the wind blew and the water rippled.
First we drew lilies and background w/ crayon, then we did blue watercolor wash on top. Lastly, shadows of blue-green were added. Love the way this student added white crayon slashes around the paper. It looks like rain. After the blue wash, he added some purple and green splatters.
This student decided to add the footbridge in crayon also, very fun. And I think his blue wash came out very interesting.

This one was super fun to watch progress. She worked so quickly with her crayons and created beautiful depth at the edge of the pond, great shadows too.
(In case you're wondering, yes, she's an older student.)


Enhanced by Zemanta

Friday, October 16, 2009

Mondrian Art

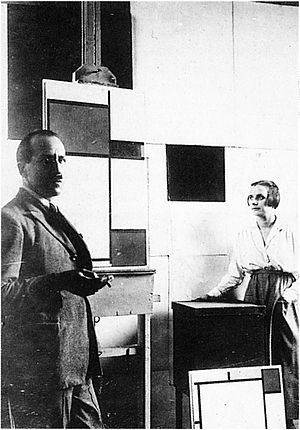
Anonymous. Piet Mondrian and Pétro (Nelly) van...Image via Wikipedia

Piet Mondrian, Netherlands 1872-1944

Materials: white paper, thin strips of black paper, paint, glue.
First - We glued the black strips onto the white paper.
Second - We drew the design on a scratch piece of paper, and placed Y's, B's, R's, and W's in the shapes we wanted to be Yellow, Blue, Red, and White.

(It was very fun watching students puzzle over the decisions of where they wanted their colors. Erasing and rearranging. Seeing brains ticking makes me giddy.)


Third - We painted the shapes.


This picture shows the student's scratch paper too, where he noted his color choices for the shapes. (Great exercise for the older students, not necessary for the wee little ones.)


Reblog this post [with Zemanta]

Wednesday, October 14, 2009

Arts Education for K-8

Washington DC - Foggy Bottom: John F. Kennedy ...Image by wallyg via Flickr

John F. Kennedy Center for the Performing Arts works to increase arts education throughout the nation.

Editorial: Arts Initiative Will Put Sacramento on the Map
Published: Sunday, Oct. 11, 2009 - 12:00 am Page 6E

I don't live in Sacramento, but I'm encouraged by this recent article. Yes, yes, yes, more arts in the schools!

Reblog this post [with Zemanta]


What kids say......

Title page from the second edition of Samuel J...Image via Wikipedia

Earlier this week I heard another gem coming out of a kid's mouth. Two sixth grade boys looked to be pals and were mingling in an area where I could hear them. (Okay, overhear them. Yes, my eavesdropping skills are fine tuned and if it were a sport I'd be listed among the elite.)
One boy said to the other, "What's the definition of the word definition?"
The other boy thought it was hilarious.........and so did I!


Reblog this post [with Zemanta]

Tuesday, October 13, 2009

Peek-a-boo Tigers


These fun tigers are meant to be hiding behind jungle leaves. Are they playing peek-a-boo?


TIGER drawing and painting steps....

Start with a dot in the middle of the page.
Draw tiger cheeks to the left and above the dot.
Add nose and eyes.

Ears.

Stripes.
Chest and legs.

Paws.
Back legs.

Stomach line.

Rump and back line.

Tail.
Stripes.

Forehead stripes.
Paint vines and leaves, and grass.

For jungle foilage, we used real leaves, paint, brayer, and waxed paper.

Roll paint onto leaves.
Place painted leaves on top of tiger and press with your hand, or roll with rolling pin.

Peek-a-boo Tiger.